
.jpeg)
Google Analytics 4 events available using the Google Sales Channel App
After you set up GA4 on your store, the following events are automatically tracked.

https://help.shopify.com/en/manual/reports-and-analytics/google-analytics/tracking-ecommerce-events-using-analytics
The biggest benefit provided here, especially for non Shopify Plus users, is that events are fired across all checkout steps, something not possible using a direct theme code installation, non-Google Sales Channel Third Party app, customer events, or Google Tag Manager implementation of Google Analytics 4.
This is a huge win, as it not only provides page_view events for all checkout steps, but also provides specific events for begin_checkout, add_payment_info, and purchase.
Using just the events provided by this integration alone, it’s possible to construct a basic Shopping Behaviours report you may be familiar with from Google Analytics 3. This can be used to see the step-by-step numbers from users going through the checkout process.
For those looking to understand the checkout step tracking in a little more detail, or track performance of more than just begin_checkout, and purchase, keep reading.
Adding Google Analytics 4 to Shopify
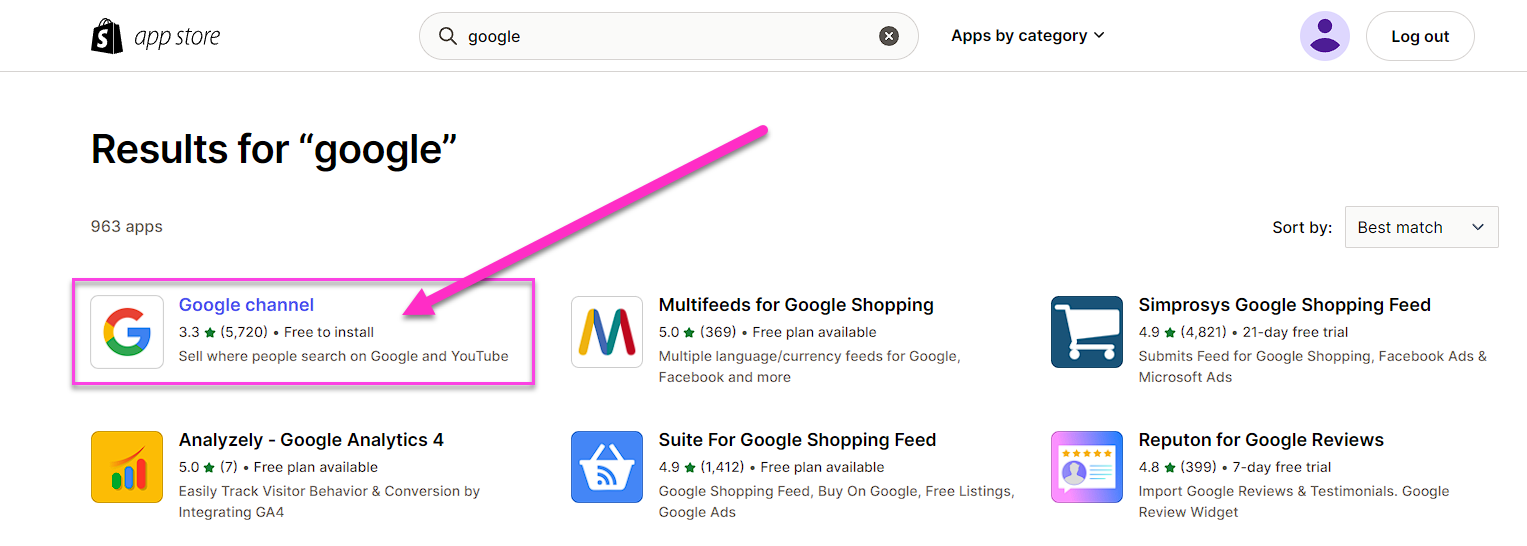
In your store dashboard,
- select “Sales channels”.
- This will open the search menu with the option for “Sales channels” pre-filtered.
If you see “Google channel” listed under the list of items recommended for businesses like yours, select that.
If not, type “google” in the search and hit enter.

This will take you to the App marketplace where you should see the channel “Google Channel” listed.
Select the channel “Google Channel”
Select “Add Sales Channel”

Select “Add Sales Channel”

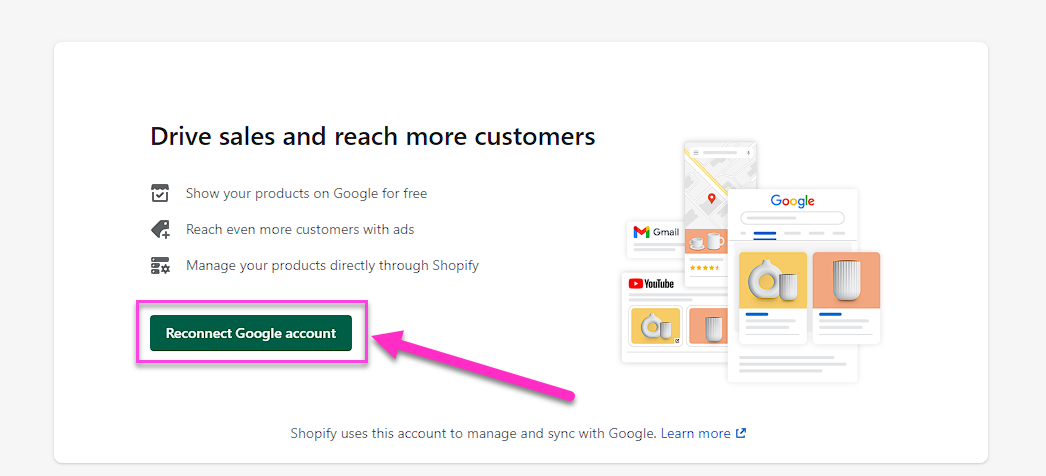
Select “Connect Google Account”.
If you have previously installed and since uninstalled this app, this will instead say “Reconnect Google Account”. Select this.
You will be prompted to select the Google Account you wish to use. Be sure to select the Google Account that has access to the Google Analytics 4 account you wish to connect.
Once successfully installed, you will be taken to Channel setup options for the Google channel.
You will immediately see an option “Looking only to set up Google Analytics 4?”.
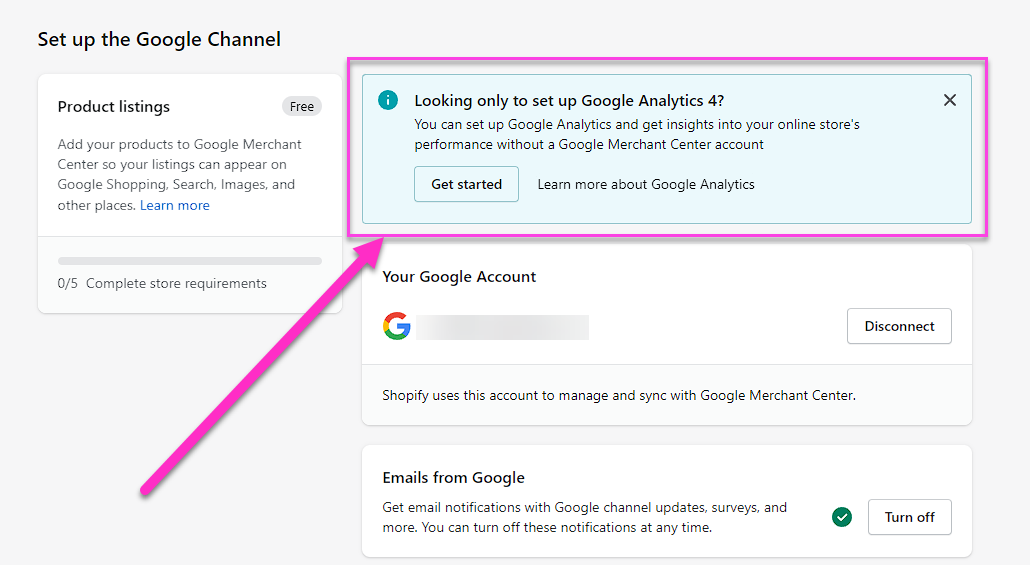
This app is also used to integrate Shopify with a Google Merchant Center, but the wording here is a little mis-leading. This allows you to install GA4, in addition to using other features if you’d like to.
To proceed adding Google Analytic 4 to your store select “Get Started”.
You now see an option to “Connect a Google Analytics Property”.
- Use the list selector to find the correct account.
- confirm by selecting “Connect”
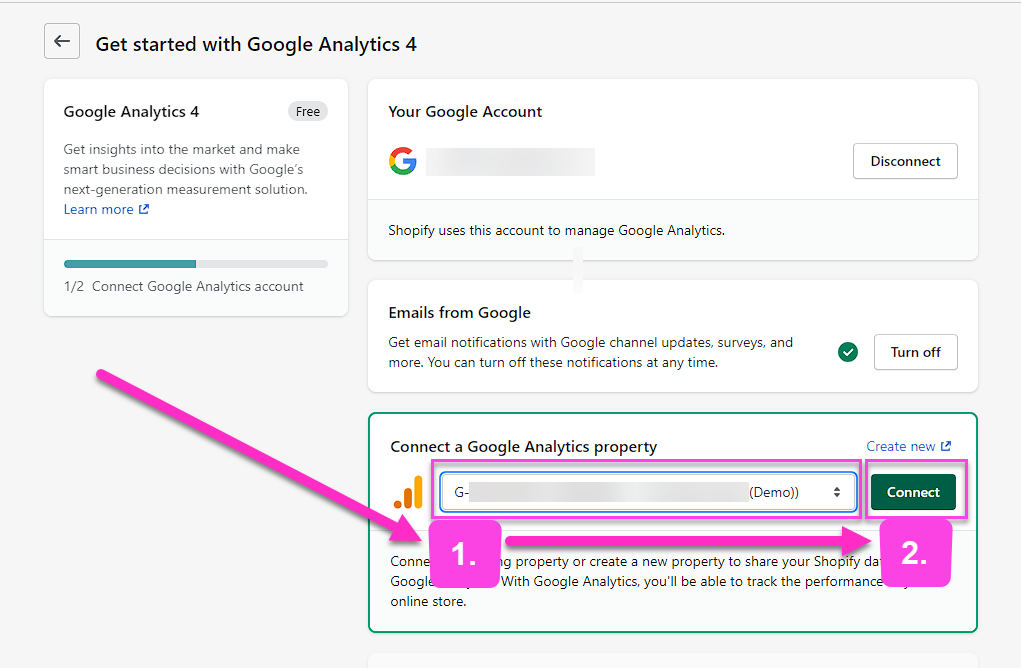
If you do not see the account you’d like to connect to the current store, check that the account you connected, shown above under “Your Google Account”, has access to the Google Analytics 4 account you wish to connect. If it doesn’t either add this user to your Google Analytics 4 account, or add a user that does have access by hitting “Disconnect” under “Your Google Account” and repeating step X for the correct account.
Once successfully connected,, you will see the message “You’ve successfully set up Google Analytics 4”. Just above that you can find the measurement ID and name of the Google Analytics 4 account currently connected.

Using the event data pushed to your Google Analytics account it is now possible to build a Shopping Behaviour Report similar to that found in Google Analytics 3/Universal which shows the number of users at each step in the shopping journey, and the conversion rates from one step to the next.
For details on how to build this report in Google Analytics 4, see our post “Building a shopping behaviour report in GA4” (Coming Soon).
%2520How%2520to%2520add%2520Google%2520Analytics%2520to%2520Shopify%2520(GA4%2520_%2520Google%2520Analytics%25204).jpeg)